Important Transformer explaination with example
1) AttributeExploder : It's Feature Based Transformer.
Typical Uses
- Transposing or manipulating tabular data (such as spreadsheets)
- Melting data
- Extracting the attribute schema from features for use in dynamic translation attribute mappings
- Extracting the attribute schema from features to write as metadata/documentation
- Preparing data for charts and reports
Exploding Type: Features
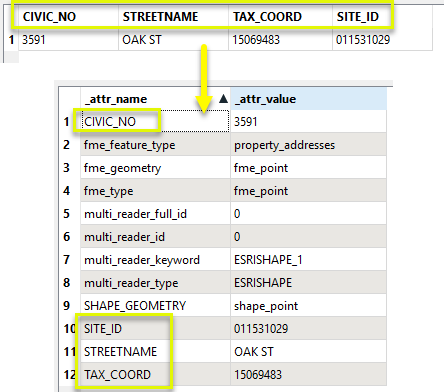
If the attributes are exploded into Features, each input feature will become many - one for every attribute in the original feature. The new features will have both the original attribute names and values added as new attributes. Below, we use the default new attribute names _attr_name and _attr_value.
One (1) feature becomes twelve (12).
In the case of a spreadsheet, where a row is considered a single feature, this is the equivalent of exploding every cell into its own feature.
Exploding Type: List
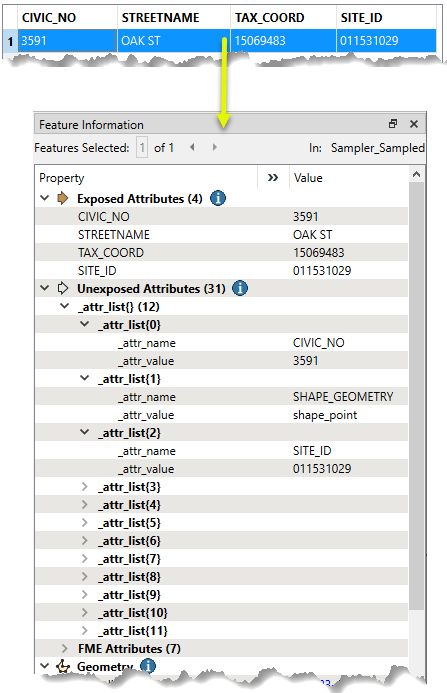
If the attributes are exploded into a List, a new list attribute is added to the original feature.
The attribute names and values are added as list elements.
One (1) feature in produces one (1) feature out, with a list attribute.
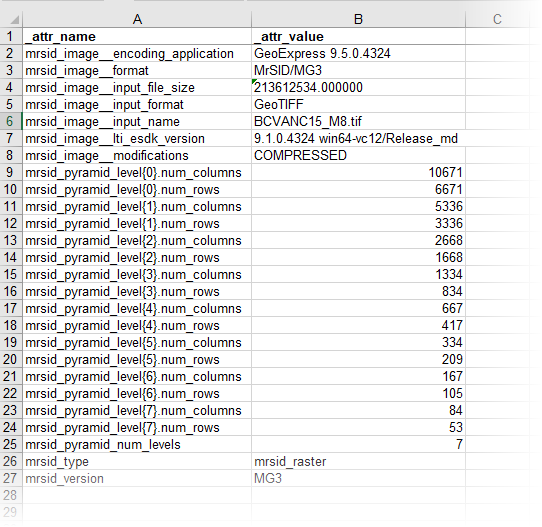
In this example, we will use an AttributeExploder to write out the attributes of a MrSID raster for documentation. One raster tile is considered a single feature.
![]()
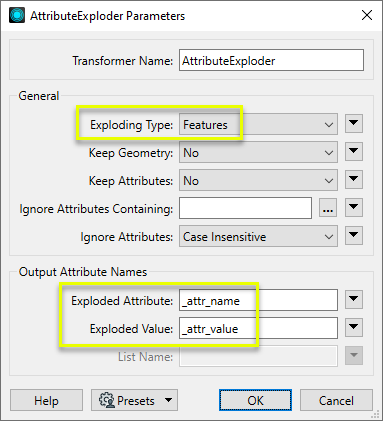
In the AttributeExploder parameters dialog, the Exploding Type is set to Features, and the default label names are kept.
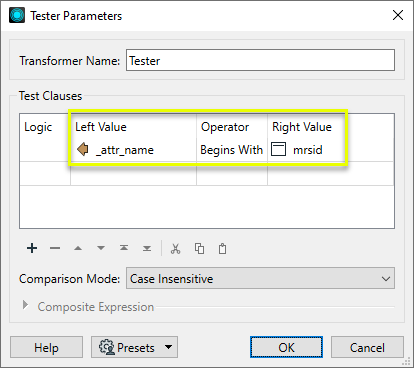
As the output will contain extra attribute types that we don’t want (reader and fme_ internal attributes), we configure a Tester to keep only features where _attr_name begins with the string “mrsid”.
With an Excel writer, a spreadsheet is created (one row per feature), containing both the attribute names and values for the original raster.
2) AreaOnAreaOverlayer
Typical Uses
- Deconstructing overlapping polygons to produce the intersections and differences
- Comparing multiple datasets for area overlaps
- Performing area calculations based on overlapping area data
The AreaOnAreaOverlayer takes in area features. All polygons are considered against each other, and where they overlap, new polygons are created that represent both the overlapping area and the original areas with the overlap removed.

The new polygons can retain attributes from all original relevant features (performing a spatial join), and a count of the number of overlaps encountered during the overlay. This count starts at 1 for all features, as they are considered to overlap themselves.
In this example, coastal zone polygons are overlaid with a parcel dataset, perhaps to identify where parcels may be subject to restrictions due to proximity to the coast. The original data looks like this:
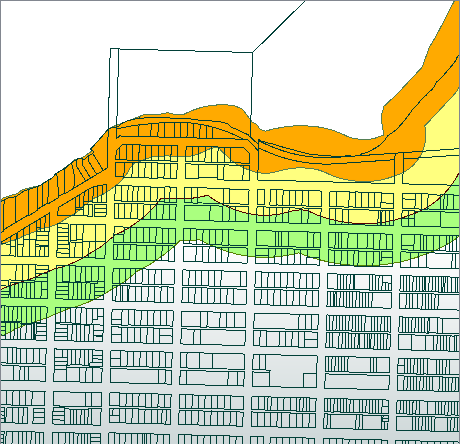
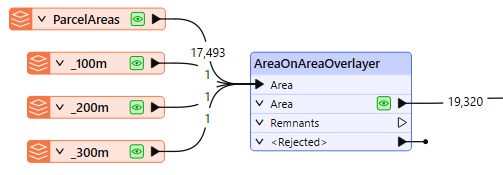
In this segment of a workspace, the input features - three polygons representing different setbacks from the coast and the parcel fabric - are routed into the Area input port.
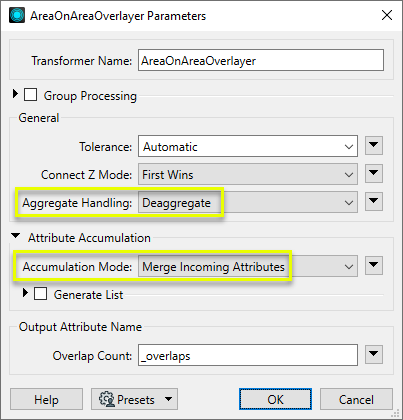
In the parameters dialog, we make the following selections:
- Aggregate Handling: Deaggregate, to ensure all areas will be processed
- Attribute Accumulation: Accumulation Mode is set to Merge Incoming Attributes.
As the overlay is processed, new area features are created, with the merged attributes of their source features. Some parcels are divided if they partially intersect a zone polygon, and areas representing the space between the parcels that falls within a zone polygon are also created (in this example, generally representing roads and laneways).
As we are interested in the parcels themselves, we have added a TestFilter to route the parcel polygons by zone and discard the non-parcel features.
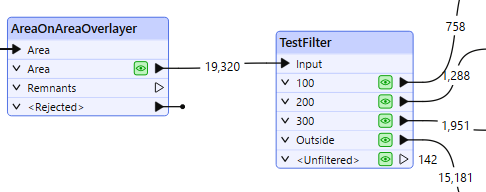
By creating test clauses that check for the existence of the ParcelA_ID attribute, non-parcel areas are output via the <Unfiltered> port, and discarded.

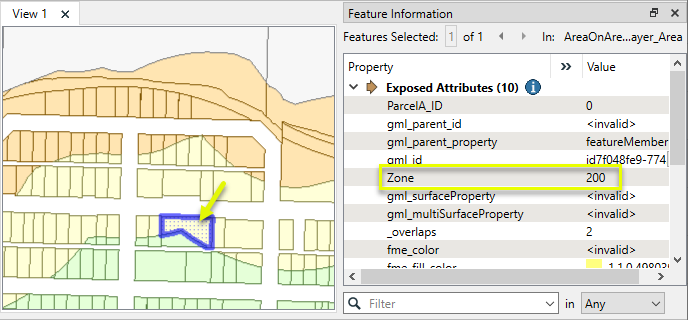
The results, viewed in the Data Inspector, with color coding by Zone.
3) AttributeCreator
Typical Uses
- Add a new attribute to a feature and assign it a value
- Add a new empty attribute to a feature for use elsewhere in the workspace
- Unmelting (reverse melting) data
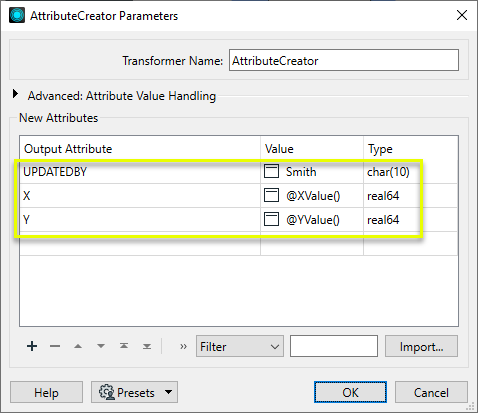
- In this example, three new attributes are added to the input features:
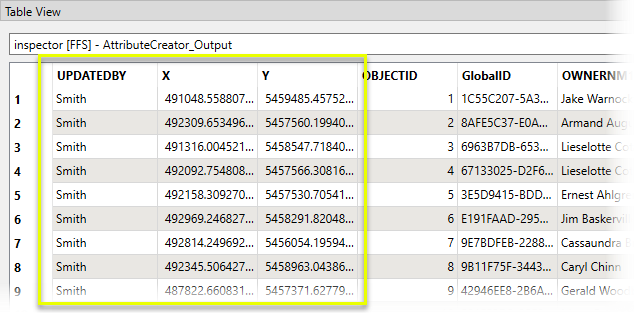
- UPDATEDBY is added and set to the constant value “Smith”.
- X and Y are added, and set to the feature’s coordinates by extracting geometry with an FME function.
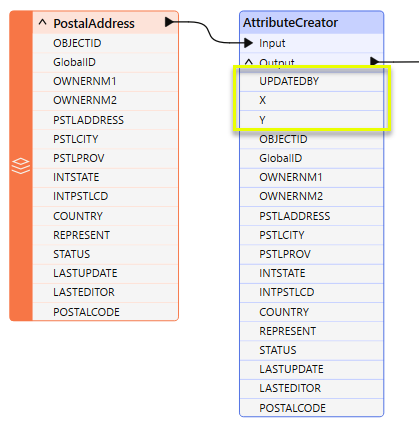
The new attributes are reflected in the transformer, at the top of the attribute list.
The attribute values are updated, and can be viewed in the Data Inspector’s table view.
4) AttributeKeeper
Removes all attributes and list attributes, except the specific ones you specify to be retained.
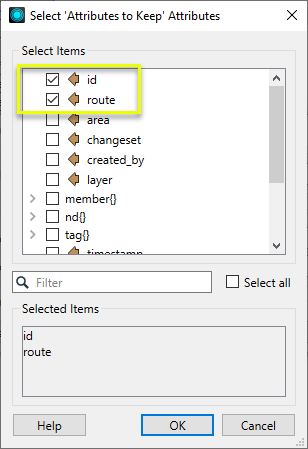
In this example, two attributes are selected from the pick list to keep.
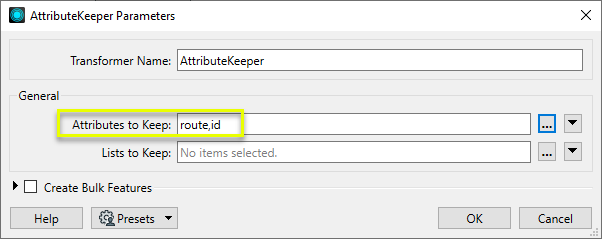
The Attributes to Keep parameter is populated with those choices.
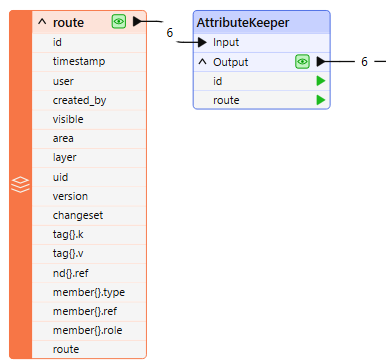
As the features exit the transformer, all of the unwanted attributes have been removed, including all lists:
Usage Notes
- If the number of attributes you want to keep is greater than the number of attributes you want to remove, consider using the AttributeManager.
- Use the AttributeManager to remove selected individual attributes from a feature.
- Use the BulkAttributeRemover to remove all attributes that match a pattern.
- To keep a Format attribute, expose it first, either in the reader or by using the AttributeExposer
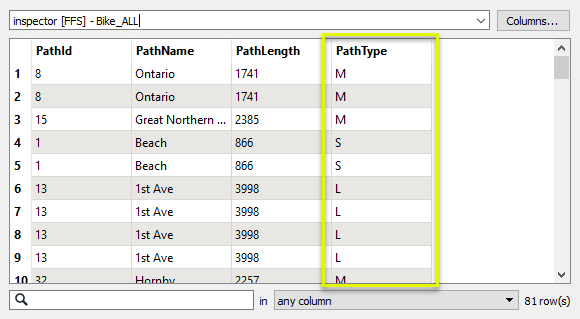
The features are routed into an AttributeValueMapper.

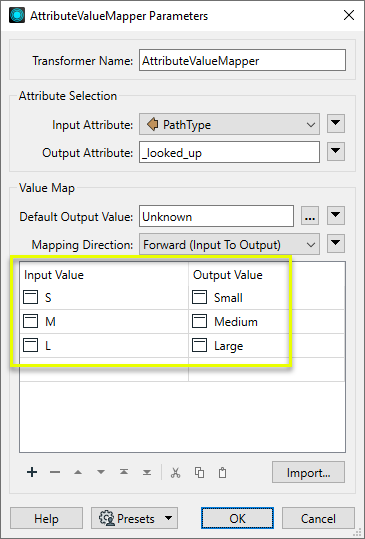
In the parameters dialog, we select PathType as the Source Attribute, keep the default Destination Attribute name _looked_up, and assign a Default Value of Unknown (which will be used for any feature that has a PathType not found in our lookup table).
For each of our possible Source Attribute values, we create a value pair in the Value Map.
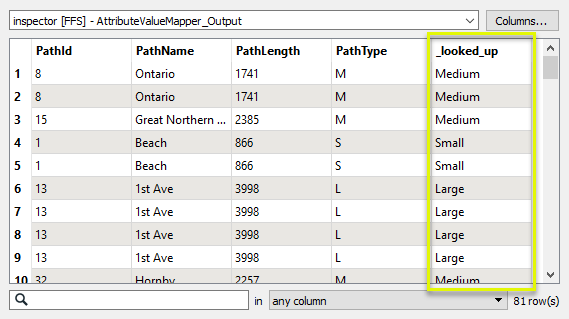
The output features now have a new attribute, _looked_up, containing the mapped values.
Example: Cleaning up attribute values
In this example, we have a dataset of food vendors, in which the DESCRIPTION attribute values have a number of errors and style differences such as capitalization. There are also some values that we want to combine into broader categories.
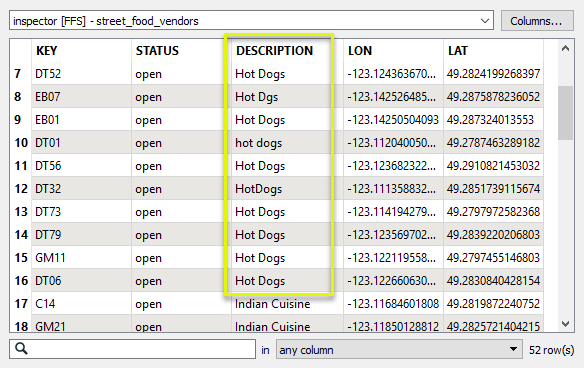
The features are routed into an AttributeValueMapper. In order to find all possible values in the dataset, we will use the Import wizard in the parameters dialog.
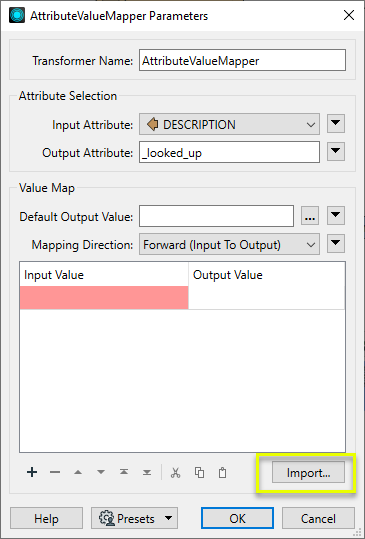
The first step is to select the dataset to import - choose the same dataset we want to clean up.
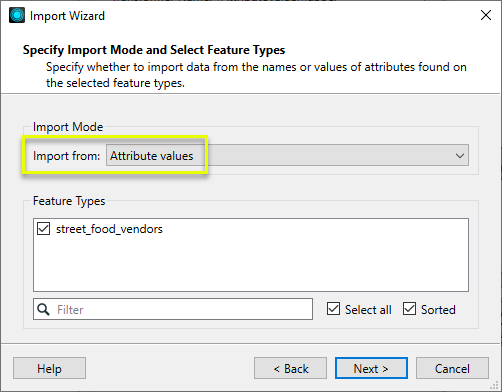
Note that on the second dialog - Specify Import Mode - we need to change the Import Mode to Attribute Values.
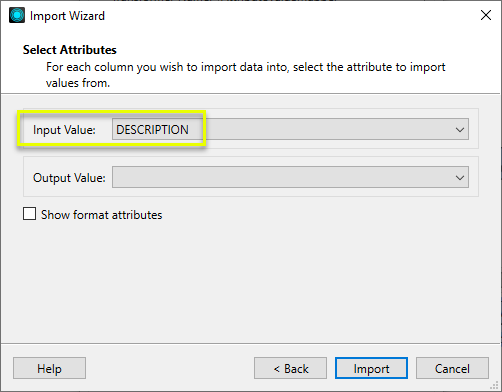
Next, on the Select Attributes dialog, we specify the Source Value as DESCRIPTION. We are not importing Destination Values (as we might if loading a predefined value map), and so it is left blank. Click Import to finish.
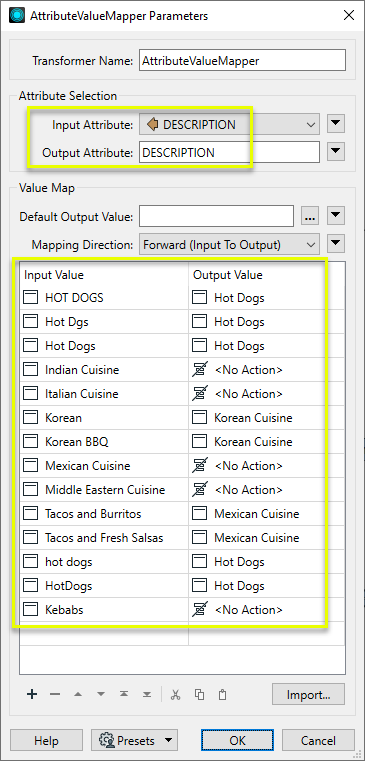
The dataset is scanned for all existing values, and they are loaded into the Value Map. Then we complete the Destination Valueside of the table. Note the following choices:
- All variations of Hot Dogs (hot dogs, HotDogs, HOT DOGS, and so forth) are mapped to Hot Dogs.
- Several values that are already in the desired form (Indian Cuisine, Italian Cuisine) have <No Action> assigned to them, and so will not be changed.
- Some related types are assigned a common name and so will be combined (Korean Cuisine, Mexican Cuisine).
Note that the Destination Attribute is the same as the Source Attribute. This will result in the new values overwriting the original values (except for those denoted as <No Action>).
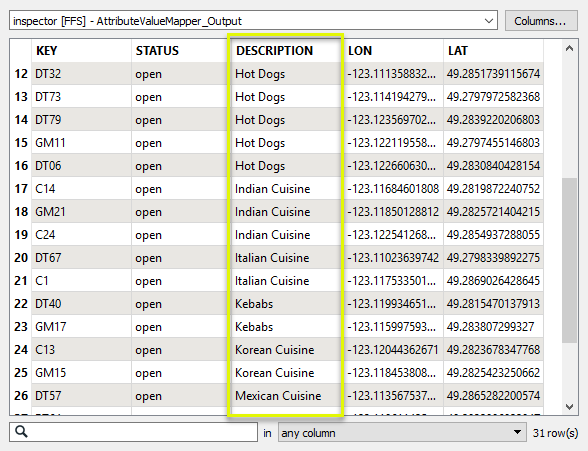
The cleaned up output features reflect the desired changes.
- Remove multiple attributes from features where the attribute names have something in common, such as a prefix, suffix, string, or a pattern that can be described with a regular expression.
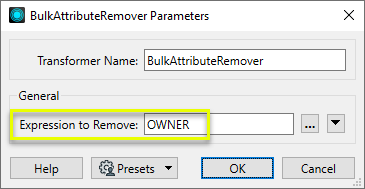
In this example, attributes containing the string “OWNER” are removed to anonymize the data.
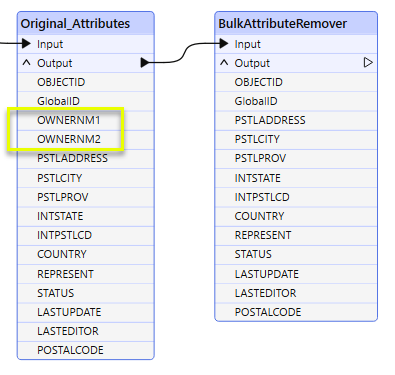
Non-matching attributes pass through untouched, and the two attributes that do match are removed from the output.
- Change the name of an existing attribute
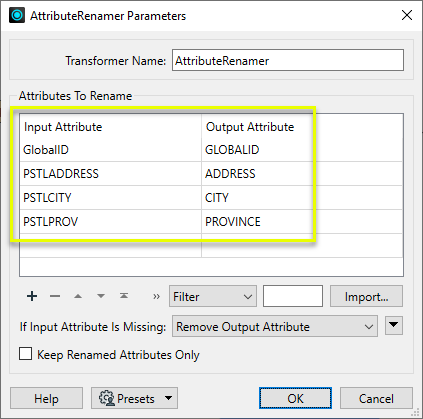
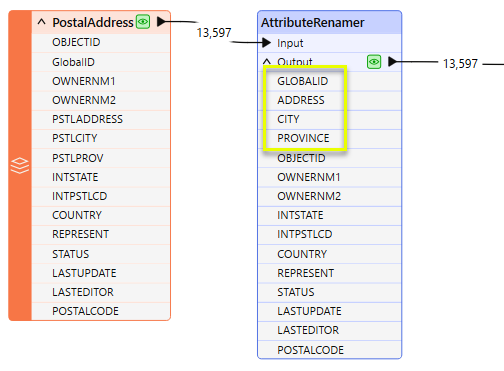
In this example, several attributes are renamed at once. “GlobalID” undergoes a case change to become “GLOBALID”, and three more attributes are renamed.
The changes are reflected in the transformer - note that the renamed attributes appear by default at the top of the list.
8) AttributeSplitter
Splits attribute values into parts, based on a delimiter or fixed-width pattern, and creates a list attribute containing one list element for each part.
Example: Splitting an attribute with a variable number of parts (delimiter)
In this example, we have a dataset of food trees. For each location, there may be any number of individual trees, and the names of the varieties are stored in the FOOD_TREE_VARIETIES attribute. The names of the varieties are separated by semicolons - “;”.
We will split this attribute into a list attribute for further processing in the workspace.

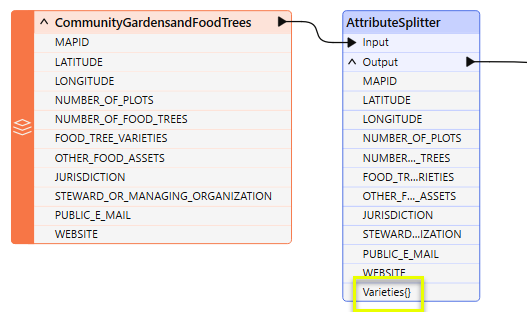
The Food Trees dataset is routed into an AttributeSplitter, where the new list attribute - Varieties{} - will be created.
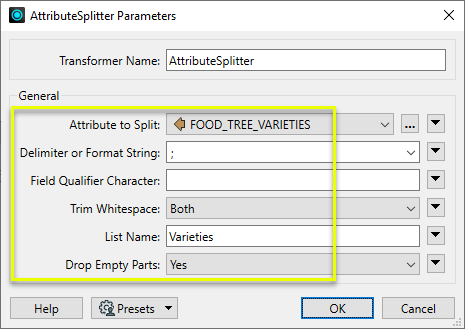
In the parameters dialog, we select the name of the attribute and define how the split should be done. Delimiter or Format String is set to ; (semicolon), any whitespace will be trimmed, any empty parts will be dropped, and the new list attribute is named Varieties.
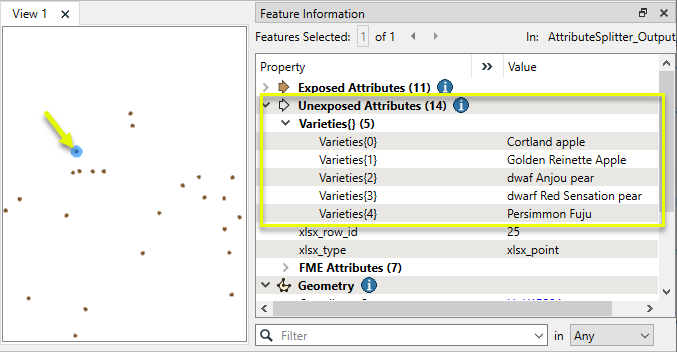
Viewing the results in the Data Inspector, the FOOD_TREE_VARIETIES attribute has been split into its component parts, and the parts have been added as individual elements to the new list attribute.
![]() Example: Splitting delimited addresses into attributes (exposing individual list elements)
Example: Splitting delimited addresses into attributes (exposing individual list elements)
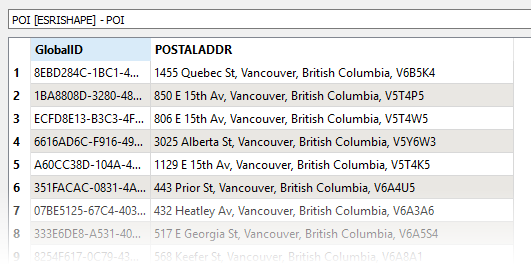
In this example, we have a shapefile containing points of interest, with postal addresses included as a single attribute. The parts of the addresses are separated by commas.
Unlike the first example (with a variable number of tree types), we do know how many parts these attributes should have.
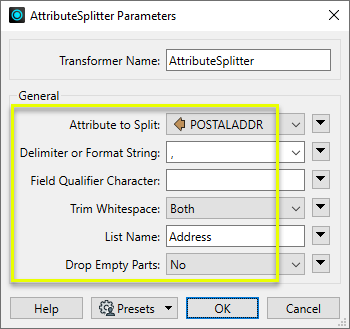
In the parameters dialog, the Delimiter is set to comma (,), we will trim whitespace, and create a new list attribute called Address. Note that Drop Empty Parts is set to No - if part of an address is missing, dropping it would cause the other parts to end up in the wrong list element.
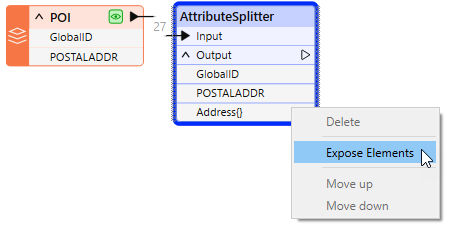
With the AttributeSplitter configured, the Address{} list is now available in the transformer output. Right-click (context menu) on the list name, and we can Expose Elements from the list.
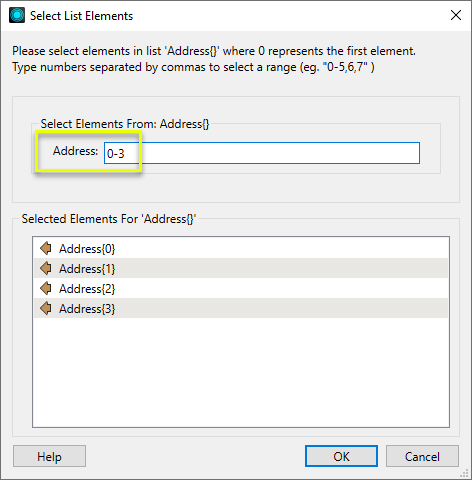
List elements are numbered starting with zero (0). In the Select List Elements dialog, entering the range 0-3 will expose the four total list elements that make up the address.
With the list elements exposed and now accessible, an AttributeManager is used to rename them according to their content.
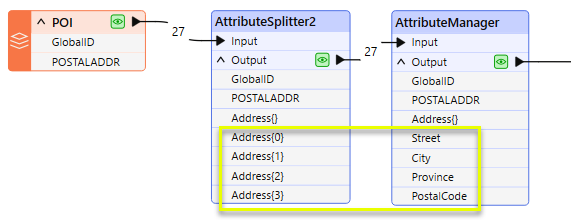
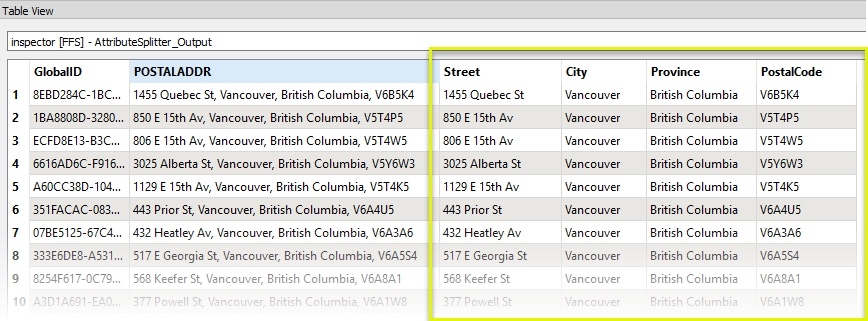
The output features now have individual address component attributes.
Example: Splitting attributes with fixed-width component parts (format string)
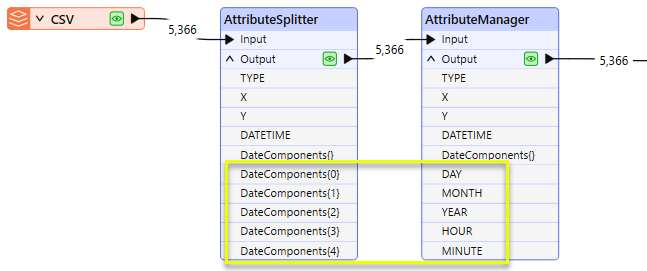
In this example, we have a dataset of crime incidents. The DATETIME attribute contains a string composed of date and time information, which we want to split into its component parts.
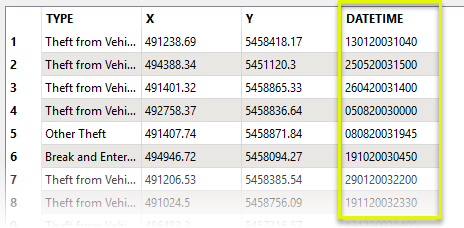
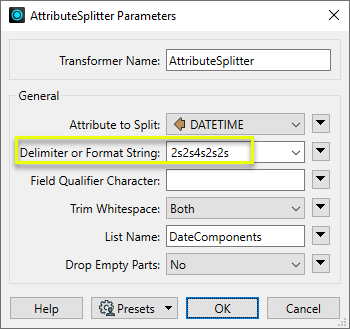
The features are routed into an AttributeSplitter. In the parameters dialog, we use a Format String to split the attribute at defined character positions. The Format String uses a #s#s#s format - integers defining the width of each part, separated by an “s” character.
After exposing all of the list elements, an AttributeManager renames them, and they are available as attributes.


No comments:
Post a Comment